
AbleSet
MIDI Mapping
If you prefer controlling your setlist via MIDI instead of a phone or tablet, you can either use AbleSet's built-in MIDI mapping or AbleSet's Max for Live device.
MIDI Mapping Settings
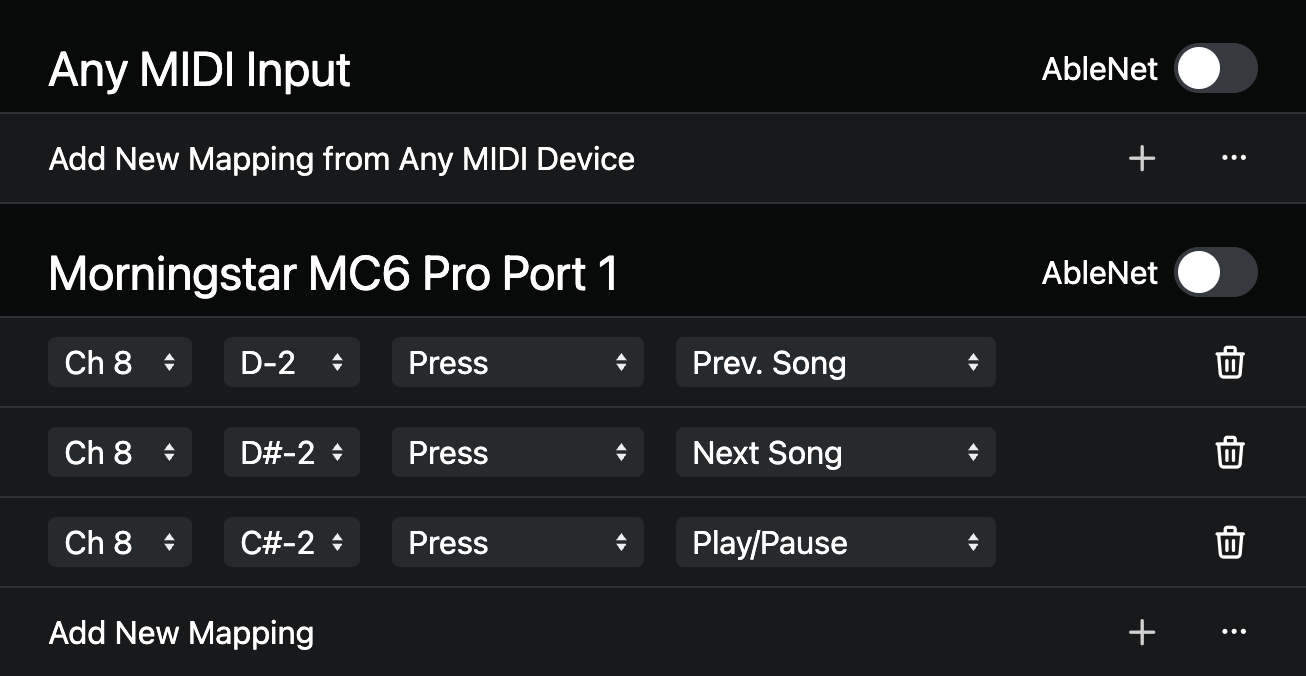
To start mapping incoming MIDI to functions in AbleSet, go to the settings page and click on "Edit MIDI Mapping" in the "MIDI Mapping, OSC & Scripting" section. This will open a page showing a list of all connected MIDI devices, like in the image above.
To map a MIDI button to an AbleSet function, click "Add New Mapping" under the device you'd like to map, then press the desired button, turn the knob, or move the slider. AbleSet captures the incoming MIDI and adds a new mapping that you can customize by selecting the function to map it to.
Currently, MIDI notes, PC, and CC values can be mapped to functions in AbleSet.
If you don't have your MIDI controller available to learn MIDI mappings, you can click the three dots on the right of the "Add New Mapping" button to manually add mappings.
A Note About Using MIDI Mapping on Windows
On Windows, only one application can access a given MIDI input at a time. This means that when you map a MIDI device in AbleSet, Ableton Live can't access it anymore, and the other way around.
To avoid interference issues, please ensure that MIDI devices you map in AbleSet are completely disabled in Live's MIDI settings.
The Go Button
This function is a combination of actions based on the current state of your set. If you only have one button on your MIDI controller, try mapping it to this for the following functions:
- When stopped at the end of a song, it jumps to the next song
- When stopped inside of the song, it starts playback
- When playing in a loop, it escapes the loop
- When playing while a song or section is queued, it instantly jumps to it
The AbleNet Toggle
Each MIDI input has its own AbleNet toggle that determines whether MIDI commands should be forwarded to other AbleSet instances on the network.
- No redundant setup: Leave this toggle turned off.
- Redundant setup where all computers receive MIDI: Leave this toggle turned off to prevent commands from being executed twice.
- Redundant setup where only one computer receives MIDI: Turn this toggle on so commands are executed on all computers.
Custom OSC
If you'd like to customize your button mappings further, you can map them
to the "Custom OSC" function. This allows you to enter any list of OSC commands
for AbleSet to run, delimited by a semicolon. For example, to stop playback and
jump to the next song, you'd enter /global/stop; /setlist/jumpBySongs 1. A
list of all supported OSC commands is available here.
If you'd like AbleSet to wait before sending the next command, you can add a
//sleep statement. For example, to sleep 2.5 seconds between stopping and
jumping to the next song: /global/stop; //sleep 2500; /setlist/jumpBySongs 1.
You can find a list of all control flow statements here.
OSC commands can also be sent to external servers. This allows you, for example,
to control digital mixers or light desks. To send a command to an external OSC
server, simply add its IP address and port to the beginning of the command, for
example: 192.168.1.25:10023/ch/01/mix ON. You can combine those commands with
AbleSet commands. For example: /global/play; 192.168.1.25:10023/ch/01/mix ON.
Custom Script
With AbleSet Pro, you can map incoming MIDI to scripts. These scripts have access to MIDI data and OSC values and can send MIDI themselves.
There are two ways to add a script mapping. The first works similarly to the "Custom OSC" mapping. Add a Note, CC, or PC mapping and set the command to "Custom Script". This script will be called every time the mapping is triggered.
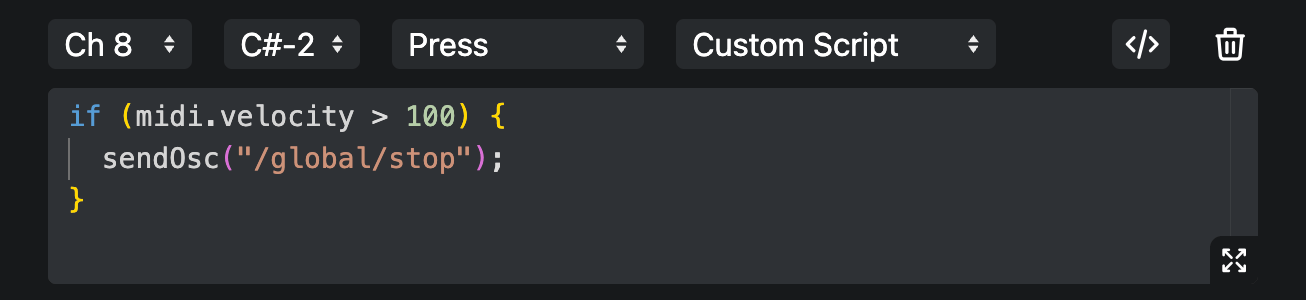
If you'd like your script to run every time AbleSet receives any MIDI from an input, click the three dots on the right of the "Add New Mapping" button and select "Script".
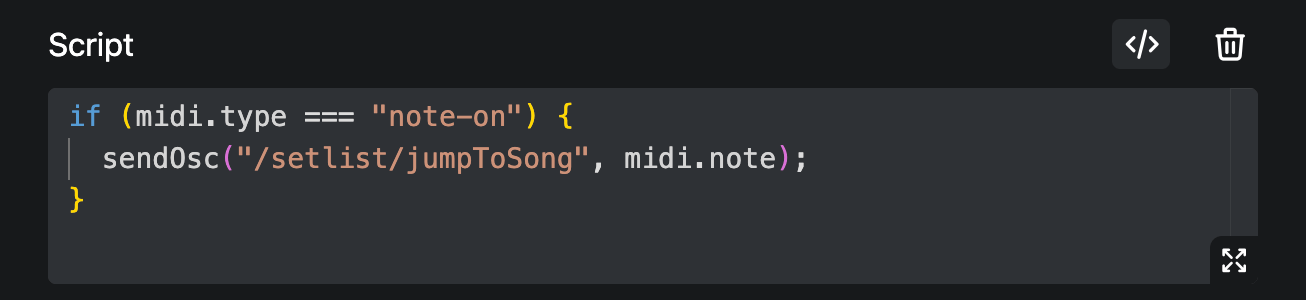
To access the incoming MIDI data, use the midi object. This object contains
the raw MIDI bytes along with parsed information if the data is detected as a
Note, CC, or PC. Use the script editor's autocomplete function or log the midi
object to get an overview of available properties.
The midi object might look like this for a "Note On" event:
{
  type: "note-on",
  channel: 8,
  raw: [151, 2, 127],
  note: 2,
  velocity: 127,
  input: "Morningstar MC6 Pro Port 1"
}
Max for Live Device
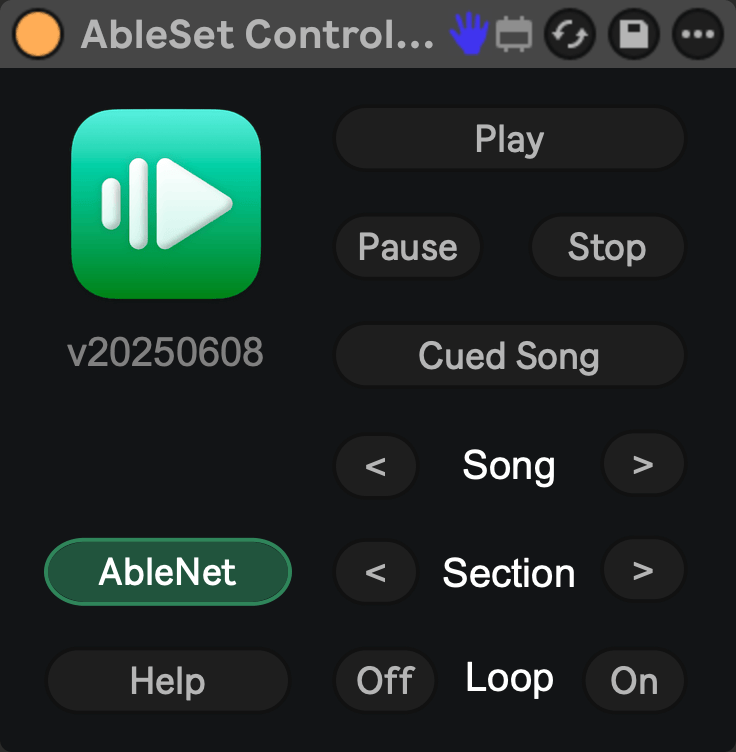
This device isn't needed anymore, but if you prefer to use Ableton Live's MIDI mapping feature to control AbleSet, you can add it to your project.
You can find the controller by going to AbleSet's settings and clicking "Get AbleSet Controller". If you're using AbleSet 1, you can download the legacy controller device here.
To use this device, just drag it on any audio or MIDI track in your Ableton session. The controller will connect to AbleSet automatically. You can then map any of the functions to your MIDI controller as you're used to.
The Play, Pause, Next Song, and Prev. Song buttons are self-explanatory, but the Cued Song button has special safety behavior. It only plays a song when:
- Playback has been stopped by a STOP (or .) locator, in which case it plays the next song, or
- Playback is stopped and the playhead is on a song's start locator, in which case it plays the current song.
This prevents accidental skips to the next song while the current song is still playing. In the most minimal setup, you only need to map this button to your MIDI controller.
In addition to the control functions, the controller sends more detailed playhead information to AbleSet that improves the position display.
This page was last modified on 2026-02-06